What Are the Most Common Sprinkler Problems
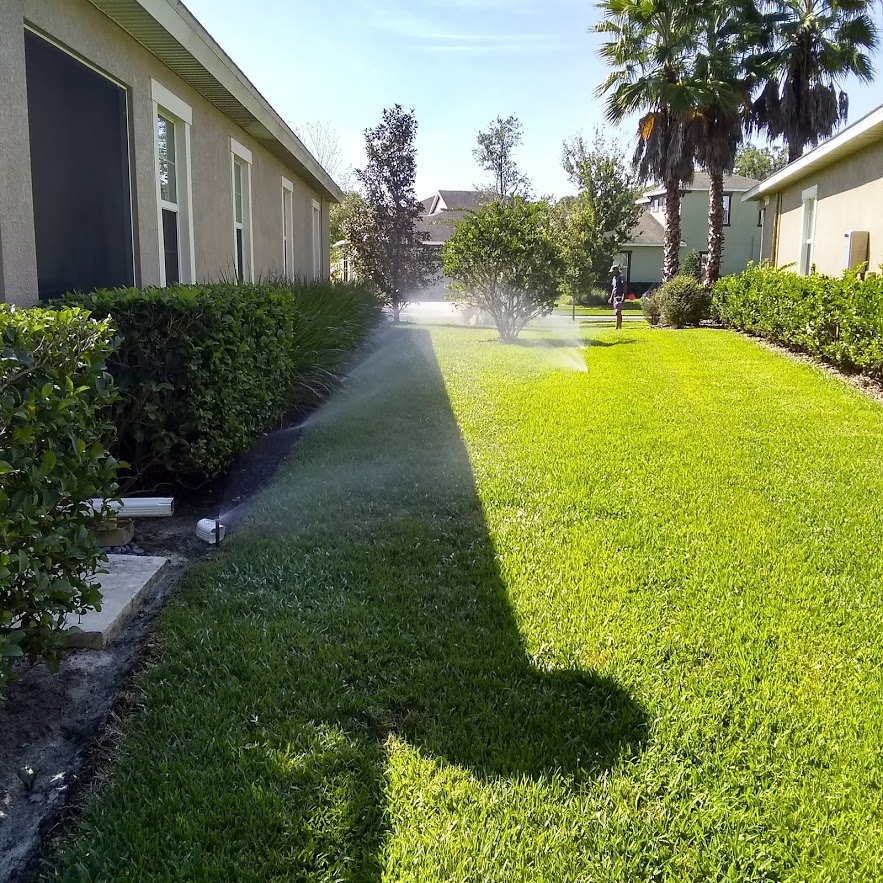
A flourishing garden, a lush green lawn, and vibrant landscapes—they all have one thing in common: a functional sprinkler system. If you’ve ever marveled at the beauty of a well-irrigated outdoor space, you’re not alone. However, what often goes unnoticed is the unsung hero behind these picturesque scenes – the sprinkler system.
Your sprinkler system is like the invisible gardener, tirelessly working to quench the thirst of your beloved plants and grass, ensuring they thrive and flourish. But like any other piece of machinery, sprinkler systems can encounter hiccups along the way, and when they do, it can be a wet and wild challenge to restore them to their full, efficient glory.
That’s where we step in, with this article serving as your trusty guide. We’re here to demystify the realm of sprinkler systems and empower you with the knowledge and know-how to tackle those inevitable hiccups head-on. Whether you’re a seasoned gardener or just getting your hands dirty for the first time, understanding and resolving common sprinkler problems is a skill that will keep your outdoor oasis thriving.
We will explore “What Are the Most Common Sprinkler Problems” and provide you with step-by-step solutions that are as clear as a cloudless summer day. So, let’s embark on this journey together, and by the end, you’ll not only appreciate your sprinkler system’s role in maintaining your slice of Eden but also be well-equipped to ensure it never misses a beat. Let’s dive in!
Common Sprinkler Problems
When the Flow Slows: Tackling Low Water Pressure
Imagine this: the sun is shining, the sky is blue, and you’re ready to give your lawn the refreshing drink it deserves. You turn on your sprinkler system with a hopeful heart, only to be greeted by a feeble trickle of water that barely reaches your thirsty plants. Frustration sets in, but fear not, for you’ve just encountered one of the most common sprinkler problems – low water pressure.
1. The Causes of Low Water Pressure
Low water pressure can turn your watering session into a mere drizzle, leaving your lawn gasping for more. But what causes this frustrating issue? Let’s uncover the culprits:
a. Clogged Filters: Over time, filters in your sprinkler system can accumulate debris and sediment, restricting water flow.
b. Valve Issues: Faulty or partially closed control valves can restrict water flow, causing low pressure in certain zones.
c. Water Supply Problems: Sometimes, low water pressure is due to inadequate water supply from the main source or a partially closed water valve.
d. Leaks: Hidden leaks in the system can divert water away from where it’s needed, resulting in lower pressure in other areas.
2. Troubleshooting and Addressing Low Water Pressure Issues
Now, the million-dollar question: how can you breathe life back into your lackluster sprinkler system? Here’s your playbook:
a. Check Filters: Regularly clean or replace clogged filters to maintain optimal water flow.
b. Valve Examination: Inspect control valves to ensure they are fully open and functioning correctly. Replace any faulty valves.
c. Water Supply Assessment: Confirm that the main water supply valve is fully open. If it’s a shared supply, coordinate with other users to avoid simultaneous heavy use.
d. Leak Detection: Conduct a systematic check for leaks along the sprinkler lines and repair them promptly to preserve water pressure.
By addressing these root causes and performing routine maintenance, you can bid farewell to the frustration of low water pressure. Soon, your sprinkler system will be back to delivering that lush, nourishing embrace your garden craves. Stay tuned for more solutions to common sprinkler problems as we journey through this guide.
Clogged Sprinkler Heads
Unclogging the Flow: Rejuvenating Your Sprinkler Heads
In the realm of sprinkler systems, clogged sprinkler heads are the silent saboteurs of your garden’s lushness. You may not see them coming, but when they strike, your once-vibrant lawn can quickly transform into a parched patchwork. Fear not, for we’re here to unravel the mystery of clogged sprinkler heads and arm you with the tools to bring life back to your landscape.
1. Signs of Clogged Sprinkler Heads
Before we dive into the solution, let’s first decipher the telltale signs that your sprinkler heads may be suffering from a clog:
a. Reduced Spray Distance: When your sprinkler heads can’t propel water as far as they used to, it’s a clear sign of a blockage.
b. Uneven Coverage: If certain areas in your garden are drenched while others remain parched, clogs may be to blame for the unequal distribution of water.
c. Weak Spray Pattern: Instead of a steady, uniform spray pattern, you might notice erratic spurts or dribbles coming from your sprinkler heads.
d. Dry Patches: Areas that were once flourishing but now show signs of drought are often indicative of clogged heads.
2. Cleaning and Unclogging Sprinkler Heads
Now that we’ve pinpointed the problem, it’s time to roll up our sleeves and get to work. Here’s your step-by-step guide to reviving your clogged sprinkler heads:
Step 1: Turn Off the Water Supply: Safety first! Ensure your sprinkler system is turned off to prevent any accidents while working on the heads.
Step 2: Locate the Affected Sprinkler Head: Identify the specific sprinkler head or heads that need attention.
Step 3: Remove the Sprinkler Head: Gently unscrew the clogged sprinkler head from its housing, using a wrench if necessary.
Step 4: Inspect for Debris: Examine the removed head for any debris, dirt, or mineral deposits that may be causing the blockage.
Step 5: Clean the Nozzle and Filter: Use a soft brush, a toothpick, or compressed air to clear away any obstructions from the nozzle and filter.
Step 6: Rinse and Reassemble: Rinse the cleaned head with water and reassemble it carefully, ensuring a snug fit.
Step 7: Test the Sprinkler: Turn the water supply back on and check if the sprinkler head now delivers a consistent, even spray.
By following these simple steps, you can breathe new life into your clogged sprinkler heads and restore the equilibrium to your garden’s hydration. Say goodbye to dry patches and hello to a thriving landscape once again. Stay tuned for more expert solutions to common sprinkler problems as we continue our journey.
Leaking Sprinkler Lines
Sealing the Flow: Taming the Trickling Troublemakers
Picture this: you walk out into your garden oasis, ready to admire your vibrant landscape, only to find that it’s not your plants but a soggy patch of earth that’s stealing the show. Leaking sprinkler lines can turn your serene garden into a watery war zone. But fear not, for we’re here to guide you through detecting, identifying, and conquering those elusive leaks.
1. Detecting and Identifying Leaks
Detecting leaks in your sprinkler lines may seem like searching for a needle in a haystack, but with keen observation, you can uncover the culprit:
a. Visual Inspection: Look for puddles, wet spots, or unusually lush patches of grass that could indicate water escaping where it shouldn’t be.
b. Sudden Increase in Water Bill: A spike in your water bill without a corresponding increase in usage can be a telltale sign of a hidden leak.
c. Loss of Pressure: If your sprinkler system suddenly experiences reduced water pressure, it might be due to a leak siphoning water away.
d. Bubbling Soil: Sometimes, you might see soil bubbling up or air escaping from the ground around the sprinkler lines.
2. Repairing or Replacing Damaged Lines
Once you’ve unearthed the leak, it’s time to take action. Here are your options for repairing or replacing those troublesome lines:
a. Patching Small Leaks: If the leak is minor and the damage is limited to a small section of the line, you can use specialized tape or clamps designed for irrigation systems to patch it temporarily.
b. Replacing Damaged Sections: For more extensive damage or multiple leaks along a single line, it’s often more effective to replace the damaged section entirely. Cut out the damaged portion and join the remaining sections with couplings or connectors.
c. Professional Assistance: If you’re uncertain about the extent of the damage or the complexity of the repair, don’t hesitate to seek the expertise of a professional sprinkler repair service. They can diagnose the issue and execute repairs with precision.
Remember, the key to successful repair is early detection. Regularly inspect your sprinkler lines for signs of trouble to prevent minor leaks from turning into major waterlogged disasters. By mastering the art of leak detection and repair, you’ll keep your garden green and your water bills in check. Stay tuned for more expert insights into common sprinkler problems as our journey continues.
Uneven Water Distribution
Balancing Act: Ensuring Uniform Watering Across Your Domain
In the symphony of a well-maintained garden, each plant should enjoy its share of the spotlight, bathed in the soothing rhythm of falling water. However, when uneven water distribution takes center stage, it’s like a discordant note disrupting the melody. Let’s delve into the reasons behind this issue and uncover strategies to restore harmony to your garden’s hydration.
1. Reasons for Uneven Water Distribution
Uneven water distribution is a garden woe that can be caused by various factors:
a. Water Pressure Variations: Variations in water pressure across your sprinkler system can lead to some areas receiving more water than others.
b. Incorrect Sprinkler Head Placement: If your sprinkler heads are not strategically positioned, they may overlap in some areas while leaving others parched.
c. Obstructions: Obstacles like shrubs, trees, or garden décor can block the spray of your sprinkler heads, creating dry zones.
d. Nozzle Mismatch: Different sprinkler heads may have different nozzle sizes, leading to inconsistent water distribution.
2. Methods for Ensuring Even Water Coverage
Now that we’ve unveiled the culprits, it’s time to explore the solutions for achieving uniform water coverage:
a. Adjust Water Pressure: Ensure that the water pressure across your system is consistent by using a pressure regulator. This will help avoid overwatering in some areas and underwatering in others.
b. Correct Sprinkler Head Placement: Carefully position your sprinkler heads to ensure they cover the entire lawn or garden without overlapping excessively. Adjust the angle and spacing as needed.
c. Clear Obstructions: Regularly trim vegetation and remove any obstacles that obstruct the spray pattern of your sprinkler heads.
d. Use Matched Nozzles: Ensure all your sprinkler heads are equipped with nozzles of the same size and type to maintain consistent water distribution.
e. Zone Your System: Divide your sprinkler system into zones based on plant water requirements. This allows you to customize watering schedules for different areas of your garden.
f. Consider Drip Irrigation: In areas with plants that have specific water needs, consider incorporating drip irrigation systems for precise and efficient watering.
Achieving even water distribution is like conducting a symphony where every instrument plays in harmony. By addressing these factors and fine-tuning your sprinkler system, you can ensure that your garden receives the care it deserves, one perfectly timed drop at a time. Stay tuned for more expert advice on tackling common sprinkler problems as our journey continues.
Controller Problems
Mastering the Maestro: Programming Your Sprinkler Controller with Finesse
In the world of automated irrigation, the sprinkler controller is the maestro of your garden orchestra. It orchestrates the flow of water to every corner of your outdoor haven. Yet, even the most sophisticated conductor can falter, and in the case of sprinkler systems, that misstep often arises from programming errors. Let’s unravel the common mistakes that garden enthusiasts make and guide you toward the harmonious programming your lush landscape deserves.
1. Common Mistakes in Programming Sprinkler Controllers
Programming a sprinkler controller might seem straightforward, but it’s easy to get entangled in the web of settings and schedules. Here are some common blunders to watch out for:
a. Overwatering: One of the cardinal sins is setting excessive watering durations or frequencies, which can lead to soggy soil and plant stress.
b. Underwatering: On the flip side, inadequate watering can result from insufficient run times or infrequent watering, leaving your plants thirsty.
c. Ignoring Seasonal Adjustments: Failing to adapt your watering schedule to the changing seasons can wreak havoc on your garden, especially during scorching summers or chilly winters.
d. Poor Zone Management: Not categorizing your garden into zones with similar water requirements can lead to uneven watering and undernourished or overwatered plants.
e. Neglecting Rain Sensors: Many forget to integrate rain sensors, causing the system to water unnecessarily during or after rainfall.
2. Guidance on Proper Programming for Efficient Watering
Now, let’s steer clear of these pitfalls and guide you toward an efficient and precise watering schedule:
a. Understand Your Landscape: Get to know your garden’s unique needs. Identify plant types, sun exposure, and soil conditions to tailor your watering schedule.
b. Set Timely Watering: Water in the early morning or late evening to reduce water loss through evaporation and ensure optimal absorption by the soil.
c. Implement Seasonal Adjustments: Regularly update your controller settings to adapt to seasonal variations in temperature and rainfall.
d. Embrace Zone Management: Divide your garden into zones based on water needs, such as lawns, flower beds, and shrubs. Adjust watering schedules and durations accordingly.
e. Invest in Rain Sensors: Install rain sensors to automatically suspend watering when rainfall is detected, saving water and preventing overwatering.
f. Regularly Review and Adjust: Monitor your garden’s health and adjust your controller settings as needed. Be flexible and responsive to your garden’s changing requirements.
By programming your sprinkler controller with finesse, you can optimize water usage, nurture healthy plants, and cultivate a garden that’s the envy of the neighborhood. It’s time to step into the role of the conductor and create a symphony of growth and beauty in your outdoor sanctuary. Stay tuned for more expert insights into common sprinkler problems as our journey continues.
Malfunctioning Timers
Mastering Time: Troubleshooting and Replacing Faulty Sprinkler Timers
In the grand performance of garden care, your sprinkler timer is the conductor of time itself, ensuring each section of your landscape receives its well-timed dose of hydration. Yet, like any timekeeper, these essential devices can occasionally falter, disrupting the symphony of growth in your garden. Let’s delve into the signs of timer malfunctions and learn how to restore the precision of your garden’s timekeeping.
1. Signs of Timer Malfunctions
Recognizing timer malfunctions is akin to deciphering musical notes. Pay heed to these telltale signs:
a. Irregular Watering: If your sprinklers suddenly switch on and off at odd intervals or fail to follow your programmed schedule, your timer may be to blame.
b. Blank or Flickering Display: A non-responsive or flickering display could indicate an electrical issue with the timer.
c. Failure to Activate Zones: When certain zones don’t activate as scheduled, it may signify a timer malfunction, leaving parts of your garden parched.
d. Overwatering or Underwatering: Inconsistent watering durations or excessive/insufficient watering can result from timer inaccuracies.
2. Troubleshooting and Replacing Faulty Timers
Now that you’ve detected the discord in your garden’s timing, let’s explore how to restore the harmony:
a. Troubleshooting Steps:
i. Check Power Supply: Ensure the timer has a stable power supply and that there are no tripped circuit breakers or blown fuses.
ii. Inspect Wiring: Examine the wiring connections to ensure they are secure and undamaged. Loose or frayed wires can cause timer malfunctions.
iii. Reset the Timer: Try resetting the timer to its default settings and reprogramming it from scratch. This can resolve software glitches.
iv. Test Zones: Manually test each zone to confirm if the issue is with the timer or the valves. If a zone doesn’t activate, it might be a valve problem.
b. Replacing Faulty Timers:
i. Turn Off Power: Before replacing the timer, turn off the power supply to the timer to ensure safety during installation.
ii. Disconnect Wiring: Carefully disconnect the wiring from the old timer. Take note of the wire placement to ensure correct connections with the new timer.
iii. Remove the Old Timer: Unscrew and remove the old timer from its mounting bracket.
iv. Install the New Timer: Attach the new timer to the mounting bracket and connect the wires according to the notes you made earlier.
v. Program the New Timer:** Follow the manufacturer’s instructions to program the new timer with your desired watering schedule.
By following these steps, you can troubleshoot and replace a malfunctioning sprinkler timer, restoring the precise timing that your garden craves. With your timekeeper back in sync, your garden’s symphony of growth will continue uninterrupted. Stay tuned for more expert advice on conquering common sprinkler problems as our journey progresses.
Electrical Issues
Wiring Wonders: Unraveling the Mysteries of Sprinkler System Wiring
In the enchanted realm of gardens, the secret behind the dancing sprinkler’s precision lies within the intricate web of wires. These hidden threads of power weave a magical tapestry of hydration, but when wires falter, it can lead to a symphony of malfunctions. Let’s illuminate the potential issues lurking in your sprinkler system’s wiring and empower you with the knowledge to inspect and mend these vital connections.
1. Potential Issues with Sprinkler System Wiring
Wiring problems in a sprinkler system may not be as obvious as a blooming flower, but they can cast a shadow over your garden’s health. Here are some potential issues to keep an eye out for:
a. Loose Connections: Over time, wires can become loose due to weather exposure or soil shifts, disrupting the electrical circuit.
b. Frayed or Damaged Wires: Physical damage, rodents, or exposure to the elements can lead to frayed or severed wires.
c. Corroded Connectors: Corrosion at wire connections can interrupt the flow of electrical signals.
d. Faulty Solenoid Wiring: Solenoid valves play a crucial role in controlling water flow. Wiring issues to these valves can cause improper operation.
e. Wire Shorts: Shorts can occur when wires touch or come into contact with the surrounding soil or other wires.
2. Tips on Inspecting and Repairing Wiring Problems
Now, let’s embark on a journey of enlightenment, learning how to identify and mend these electrical hiccups:
a. Regular Visual Inspections: Periodically inspect your sprinkler system’s wiring for signs of wear, damage, or loose connections. Look for exposed wires and corroded connectors.
b. Test the Solenoids: Activate each zone manually and listen for the distinct click of the solenoid valves. If some zones don’t activate, it might be a wiring issue.
c. Use a Multimeter: Invest in a multimeter to check for continuity in your wires. This tool can help identify broken or severed wires.
d. Repair or Replace Damaged Wires: If you discover damaged wires, use waterproof connectors and wire nuts to repair them. For extensive damage, consider replacing the entire section of wiring.
e. Check Wire Path: Ensure that wires are properly insulated and not in direct contact with soil or vegetation. Use conduit or PVC pipes to protect them.
f. Professional Assistance: If you are uncomfortable with electrical work or cannot identify the issue, seek the expertise of a professional irrigation technician to diagnose and resolve wiring problems.
By mastering the art of inspecting and repairing sprinkler system wiring, you’ll become the guardian of your garden’s electrical heart. With every wire in perfect harmony, your garden’s vibrant melody will continue to flourish. Stay tuned for more expert advice on conquering common sprinkler problems as our journey unfolds.
Solenoid Valve Failures
Unveiling the Curtain: Solving the Enigma of Sprinkler Solenoid Valve Failures
In the intricate ballet of your sprinkler system, solenoid valves play the role of puppeteer, gracefully opening and closing the gates of hydration to your garden. Yet, when these valves falter, the dance is disrupted, leaving your landscape parched and longing. Join us as we lift the veil on the vital role of solenoid valves and discover the solutions for diagnosing and mending these elusive performers.
1. The Role of Solenoid Valves in Sprinkler Systems
Solenoid valves are the unsung heroes of your sprinkler system, responsible for controlling the flow of water to each zone. Here’s a glimpse into their pivotal role:
a. On-Demand Control: Solenoid valves are electrically controlled devices that open and close in response to signals from the sprinkler controller.
b. Zone Isolation: These valves isolate different zones in your irrigation system, allowing precise control over which areas receive water at any given time.
c. Water Conservation: By enabling individual zone control, solenoid valves optimize water distribution, reducing wastage and ensuring that each section of your garden gets its share of hydration.
2. Solutions for Diagnosing and Fixing Solenoid Valve Failures
Now that we’ve unveiled the importance of solenoid valves, let’s explore how to detect and rectify issues that may plague these critical components:
a. Visual Inspection: Begin by inspecting the solenoid valve for any visible damage, such as cracks, leaks, or loose connections. Tighten loose parts and replace damaged components.
b. Listen for Clicking: Manually activate each zone using the sprinkler controller. Listen for the characteristic clicking sound of the solenoid valve. If you don’t hear it, the solenoid may be faulty.
c. Check Wiring: Examine the wiring connected to the solenoid valve. Loose or damaged wires can lead to a lack of electrical signal, preventing the valve from opening or closing.
d. Use a Multimeter: A multimeter can help you test the continuity of the solenoid’s electrical circuit. If there is no continuity, the solenoid may need replacement.
e. Clean or Replace Diaphragms: Inside the solenoid valve, there is a diaphragm that can become clogged or damaged. Cleaning or replacing the diaphragm can often resolve issues with valve operation.
f. Valve Replacement: If the solenoid valve is beyond repair, it’s advisable to replace it entirely. Ensure you choose a valve that is compatible with your system.
By becoming a master of solenoid valve diagnosis and repair, you’ll keep the flow of hydration to your garden smooth and uninterrupted. Your landscape will flourish under the precise control of these unsung heroes, ensuring every plant receives its well-deserved spotlight. Stay tuned for more expert advice on conquering common sprinkler problems as our journey continues.
Seasonal Maintenance
Year-round Bliss: The Art of Seasonal Sprinkler System Maintenance
In the captivating story of your garden’s growth, each season unveils a unique chapter. And as every avid gardener knows, the secret to a lush, vibrant landscape lies in the delicate dance of seasonal care. Join us as we emphasize the profound significance of year-round maintenance for your sprinkler system and unveil the power of preventive measures in nurturing a trouble-free garden.
1. The Importance of Seasonal Maintenance
A thriving garden is a testament to time well spent nurturing its beauty, and your sprinkler system is the guardian of that oasis. Here’s why seasonal maintenance is the heartbeat of your garden’s health:
a. Ensuring Peak Performance: Just like a well-tuned instrument produces melodious notes, a well-maintained sprinkler system consistently delivers efficient and even watering.
b. Maximizing Lifespan: Regular maintenance safeguards the longevity of your system, saving you from costly replacements and repairs.
c. Preserving Water Resources: By preventing leaks, optimizing water distribution, and embracing water-efficient technologies, you not only nurture your garden but also conserve precious water resources.
d. Disease Prevention: Proper maintenance helps prevent overwatering or underwatering, reducing the risk of diseases that thrive in overly wet or dry conditions.
e. Time and Money Savings: Investing in seasonal maintenance is a wise choice that saves you time, money, and the hassle of emergency repairs.
2. How Preventive Measures Reduce Problems
Preventive measures are the fortifications that shield your garden from the ravages of time and nature. Here’s how they work their magic:
a. Regular Inspections: Conducting routine inspections throughout the year allows you to identify and address issues before they escalate into major problems.
b. Seasonal Adjustments: Adapting your sprinkler system’s settings with the changing seasons ensures that your garden’s water needs are always met, avoiding overwatering or underwatering.
c. Winterization: Preparing your system for winter by draining water from pipes and protecting exposed components prevents freezing damage, saving you from costly repairs in spring.
d. Upgrading Technology: Embracing water-efficient technologies like smart controllers and moisture sensors can significantly reduce water waste and lower your utility bills.
e. Professional Service: Enlisting the expertise of professional irrigation technicians for annual check-ups and maintenance ensures that your system is in top-notch condition.
In the enchanting saga of your garden’s growth, seasonal maintenance is the steady hand guiding the narrative. By embracing the importance of year-round care and the power of preventive measures, you’ll craft a story of flourishing beauty that unfolds with each passing season. Stay tuned for more expert advice on conquering common sprinkler problems as our journey continues.
Winterization
Guardians of Frost: Shielding Your Sprinkler System from Winter’s Chill
As autumn paints the world in shades of amber and gold, it’s time for gardeners to don their winter coats and prepare their beloved landscapes for the frosty embrace of winter. In this chapter, we’ll unveil the sacred art of winterization, guiding you through the steps to protect your sprinkler system from the icy clutches of the season and highlighting the myriad benefits that this crucial practice bestows.
1. Steps for Winterizing Sprinkler Systems
Winterization is the sentinel’s duty, safeguarding your sprinkler system against the harshest elements of winter. Here’s your step-by-step guide to this essential ritual:
a. Turn Off the Water Supply: Begin by shutting off the main water supply to your sprinkler system. This ensures no more water enters the system.
b. Drain the System: Open all drain valves and faucets in the system to allow water to escape. Ensure that water is drained completely from all pipes and components.
c. Blow Out the Lines: Using an air compressor with a proper attachment, blow out any remaining water from the pipes, valves, and sprinkler heads. Start with the zone farthest from the compressor and work your way backward.
d. Insulate Above-Ground Components: Wrap above-ground pipes, backflow preventers, and valves with insulation or heat tape to protect them from freezing temperatures.
e. Remove and Store Sprinkler Heads: Remove any above-ground sprinkler heads and store them indoors for the winter. Replace them with protective caps to keep debris out.
f. Disconnect and Drain Backflow Preventers: Disconnect and drain the backflow preventer to prevent damage from freezing.
g. Store Controller Indoors: If possible, disconnect and store the sprinkler controller indoors to shield it from extreme cold.
h. Cover Valve Boxes: Insulate or cover valve boxes with a layer of mulch or straw to add extra protection.
2. Benefits of Winterization
Winterization isn’t just a seasonal chore; it’s a guardian’s pledge to the longevity and vitality of your sprinkler system. Here’s why this practice is a boon for your garden:
a. Prevents Freezing Damage: Winterization ensures that no water remains in the system to freeze and expand, which can cause pipes and components to crack or burst.
b. Extends Lifespan: By safeguarding your system from winter’s fury, you extend its lifespan, saving you from costly repairs or replacements.
c. Minimizes Spring Repairs: Without winterization, spring awakening can reveal a host of costly problems. Winterization helps you start the season trouble-free.
d. Conserve Water: By preventing leaks and pipe damage, winterization helps conserve water, which is not only eco-friendly but also cost-effective.
e. Preserves Landscape: Protecting your sprinkler system means protecting the landscape it nurtures, ensuring that your garden emerges from winter unscathed.
Embrace winterization as your garden’s armor against the cold, a promise of renewal when the snow melts and the earth awakens once more. In this winter tale, you are the guardian, and your garden’s future is in your capable hands. Stay tuned for more expert advice on conquering common sprinkler problems as our journey continues.
Mastering Your Garden’s Symphony:
In our journey through the intricacies of sprinkler systems, we’ve uncovered the secrets to maintaining the lush, vibrant garden of your dreams. As we reach the crescendo of this symphony, let’s recap the key takeaways and issue a clarion call to nurture your garden with the wisdom you’ve acquired.
A. Key Takeaways
Throughout this guide, we’ve explored:
1. Common Sprinkler Problems: From low water pressure to clogged heads, we’ve delved into the most prevalent issues that can plague your sprinkler system.
2. Troubleshooting Tips: You’ve learned how to diagnose and address these problems with precision, ensuring that your garden thrives.
3. The Role of Maintenance: Regular maintenance, including seasonal care and preventive measures, is the bedrock of a trouble-free sprinkler system.
4. The Art of Winterization: Shielding your system from winter’s grasp is paramount to its longevity and your garden’s vitality.
Now, as the conductor of your garden’s symphony, it’s time to take the stage. We urge you to:
1. Be Proactive: Don’t wait for issues to surface. Regularly inspect your sprinkler system, heed the signs, and address problems promptly.
2. Embrace Seasonal Care: Recognize the importance of seasonal maintenance and adapt your system to the changing needs of your garden.
3. Master Winterization: As the frost approaches, follow the steps of winterization diligently to safeguard your system from freezing damage.
4. Seek Professional Help: When in doubt or when problems seem beyond your expertise, don’t hesitate to enlist the services of professional irrigation technicians.
Your garden is a canvas of life and color, a testament to your nurturing touch. With the knowledge you’ve gained, you’re equipped to orchestrate a garden symphony that resonates with vitality and beauty. Take the lead, and let your garden flourish under your care.
May your garden thrive, your landscapes flourish, and your outdoor haven become a sanctuary of beauty and tranquility. Keep the rhythm of nature in your heart, and let your garden’s song continue to resonate.
Additional Resources
Enhancing Your Sprinkler System Mastery
Your journey to becoming a sprinkler system virtuoso is fueled not just by knowledge but also by the right tools and professional guidance. Here’s a curated selection of resources to bolster your expertise and ensure your garden’s vitality:
Relevant Products and Tools for Troubleshooting and Repair:
1. Sprinkle of Wisdom – The Ultimate Sprinkler Maintenance Journal: If you’re seeking a comprehensive guide to mastering sprinkler care, look no further. This journal will help you keep track of maintenance schedules, system configurations, and troubleshooting notes.
2. Air Compressor: An essential tool for blowing out water from your sprinkler system before winter. It’s a critical component of winterization.
3. Multimeter: For testing the electrical continuity of your system’s wiring, a multimeter is an invaluable diagnostic tool.
4. Insulation and Heat Tape: Protect above-ground components, pipes, and valves from freezing temperatures with insulation and heat tape.
Professional Services:
1. Irrigation System Maintenance and Repair Services: If you find yourself in over your head or simply prefer to leave the intricacies of your sprinkler system to the experts, consider hiring professional irrigation technicians. They can diagnose, repair, and maintain your system efficiently. AMERICAN PROPERTY MAINTENANCE
2. Sprinkle of Wisdom – The Ultimate Sprinkler Maintenance Journal: This journal isn’t just a resource; it’s your partner in mastering sprinkler care. It simplifies complex tasks, keeps records, and empowers you with knowledge. DOWNLOAD NOW
Your journey to sprinkler system mastery is fueled by the right tools, knowledge, and expert guidance. With these resources at your disposal, you’re well-equipped to cultivate a garden that thrives in every season. Don’t hesitate to explore these options and embark on a gardening adventure filled with lush landscapes and thriving flora.